It's here, it's here! Today is the big reveal for those of us guest participants in this spring's One Room Challenge -- an amazing (and slightly insane) design event encouraging designers, decorators, bloggers, and design enthusiasts to redesign a room (from the first idea to the last steamed textile) in six weeks. Linda Weinstein of Calling It Home started this project many years ago, and my all-time favorite shelter publication -- House Beautiful -- is the media sponsor. Twenty featured designers and over 200 guest posters were involved in the ORC this season, and there are some knockout projects and stunning before-and-afters, so be sure to take some time in front of your screen over the next few days and take it all in. Inspiration abounds!

If this is your first time visiting me, welcome! I'm a Boston-based designer focused on creating beautiful, affordable spaces that incorporate all the messiness of real life. I started my business in 2014 at the ripe young age of 41, after spending nearly twenty years in public relations. While I still feel like I'm fairly new in the business, I've had some amazing opportunities in the four years I've been around, and I count myself lucky to be a part of the most wonderful, dynamic, supportive design community here in Boston. I'm glad you've landed here, and hope you'll come back again.
Now, on to the good stuff. If you haven't seen my earlier ORC posts, you can find them here:
Week 1: The Old, the Ugly, the Outdated, and the Inspiration to Change It All
Week 3: A Few Days Late and A Few Dollars Short (Um, Spent)
Week 5: So Much to Do, So Little Time
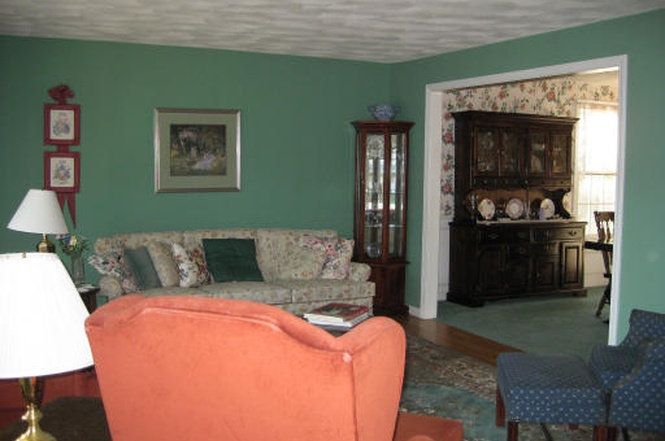
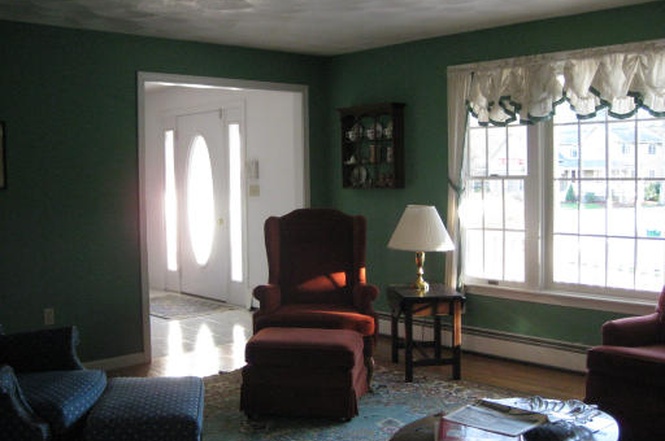
As you may remember way back from the first week, I selected the dining room to be redone. When we first bought the house, the formal living room (which became our dining room) was dated with a capital D-A-T-E-D.

Before, from the real estate listing in 2010.
We did a quick paint job, added some crown moulding, and had a beautiful custom built-in made, but it still wasn't singing to me.

Just before starting the ORC, furniture was gathered in the middle preparing for our painter.
So for eight years, I lived with it in limbo, until I got this beauty for my birthday in January.

The object that inspired the entire room: the High-Five Coper Bowl from Jill Rosenwald.
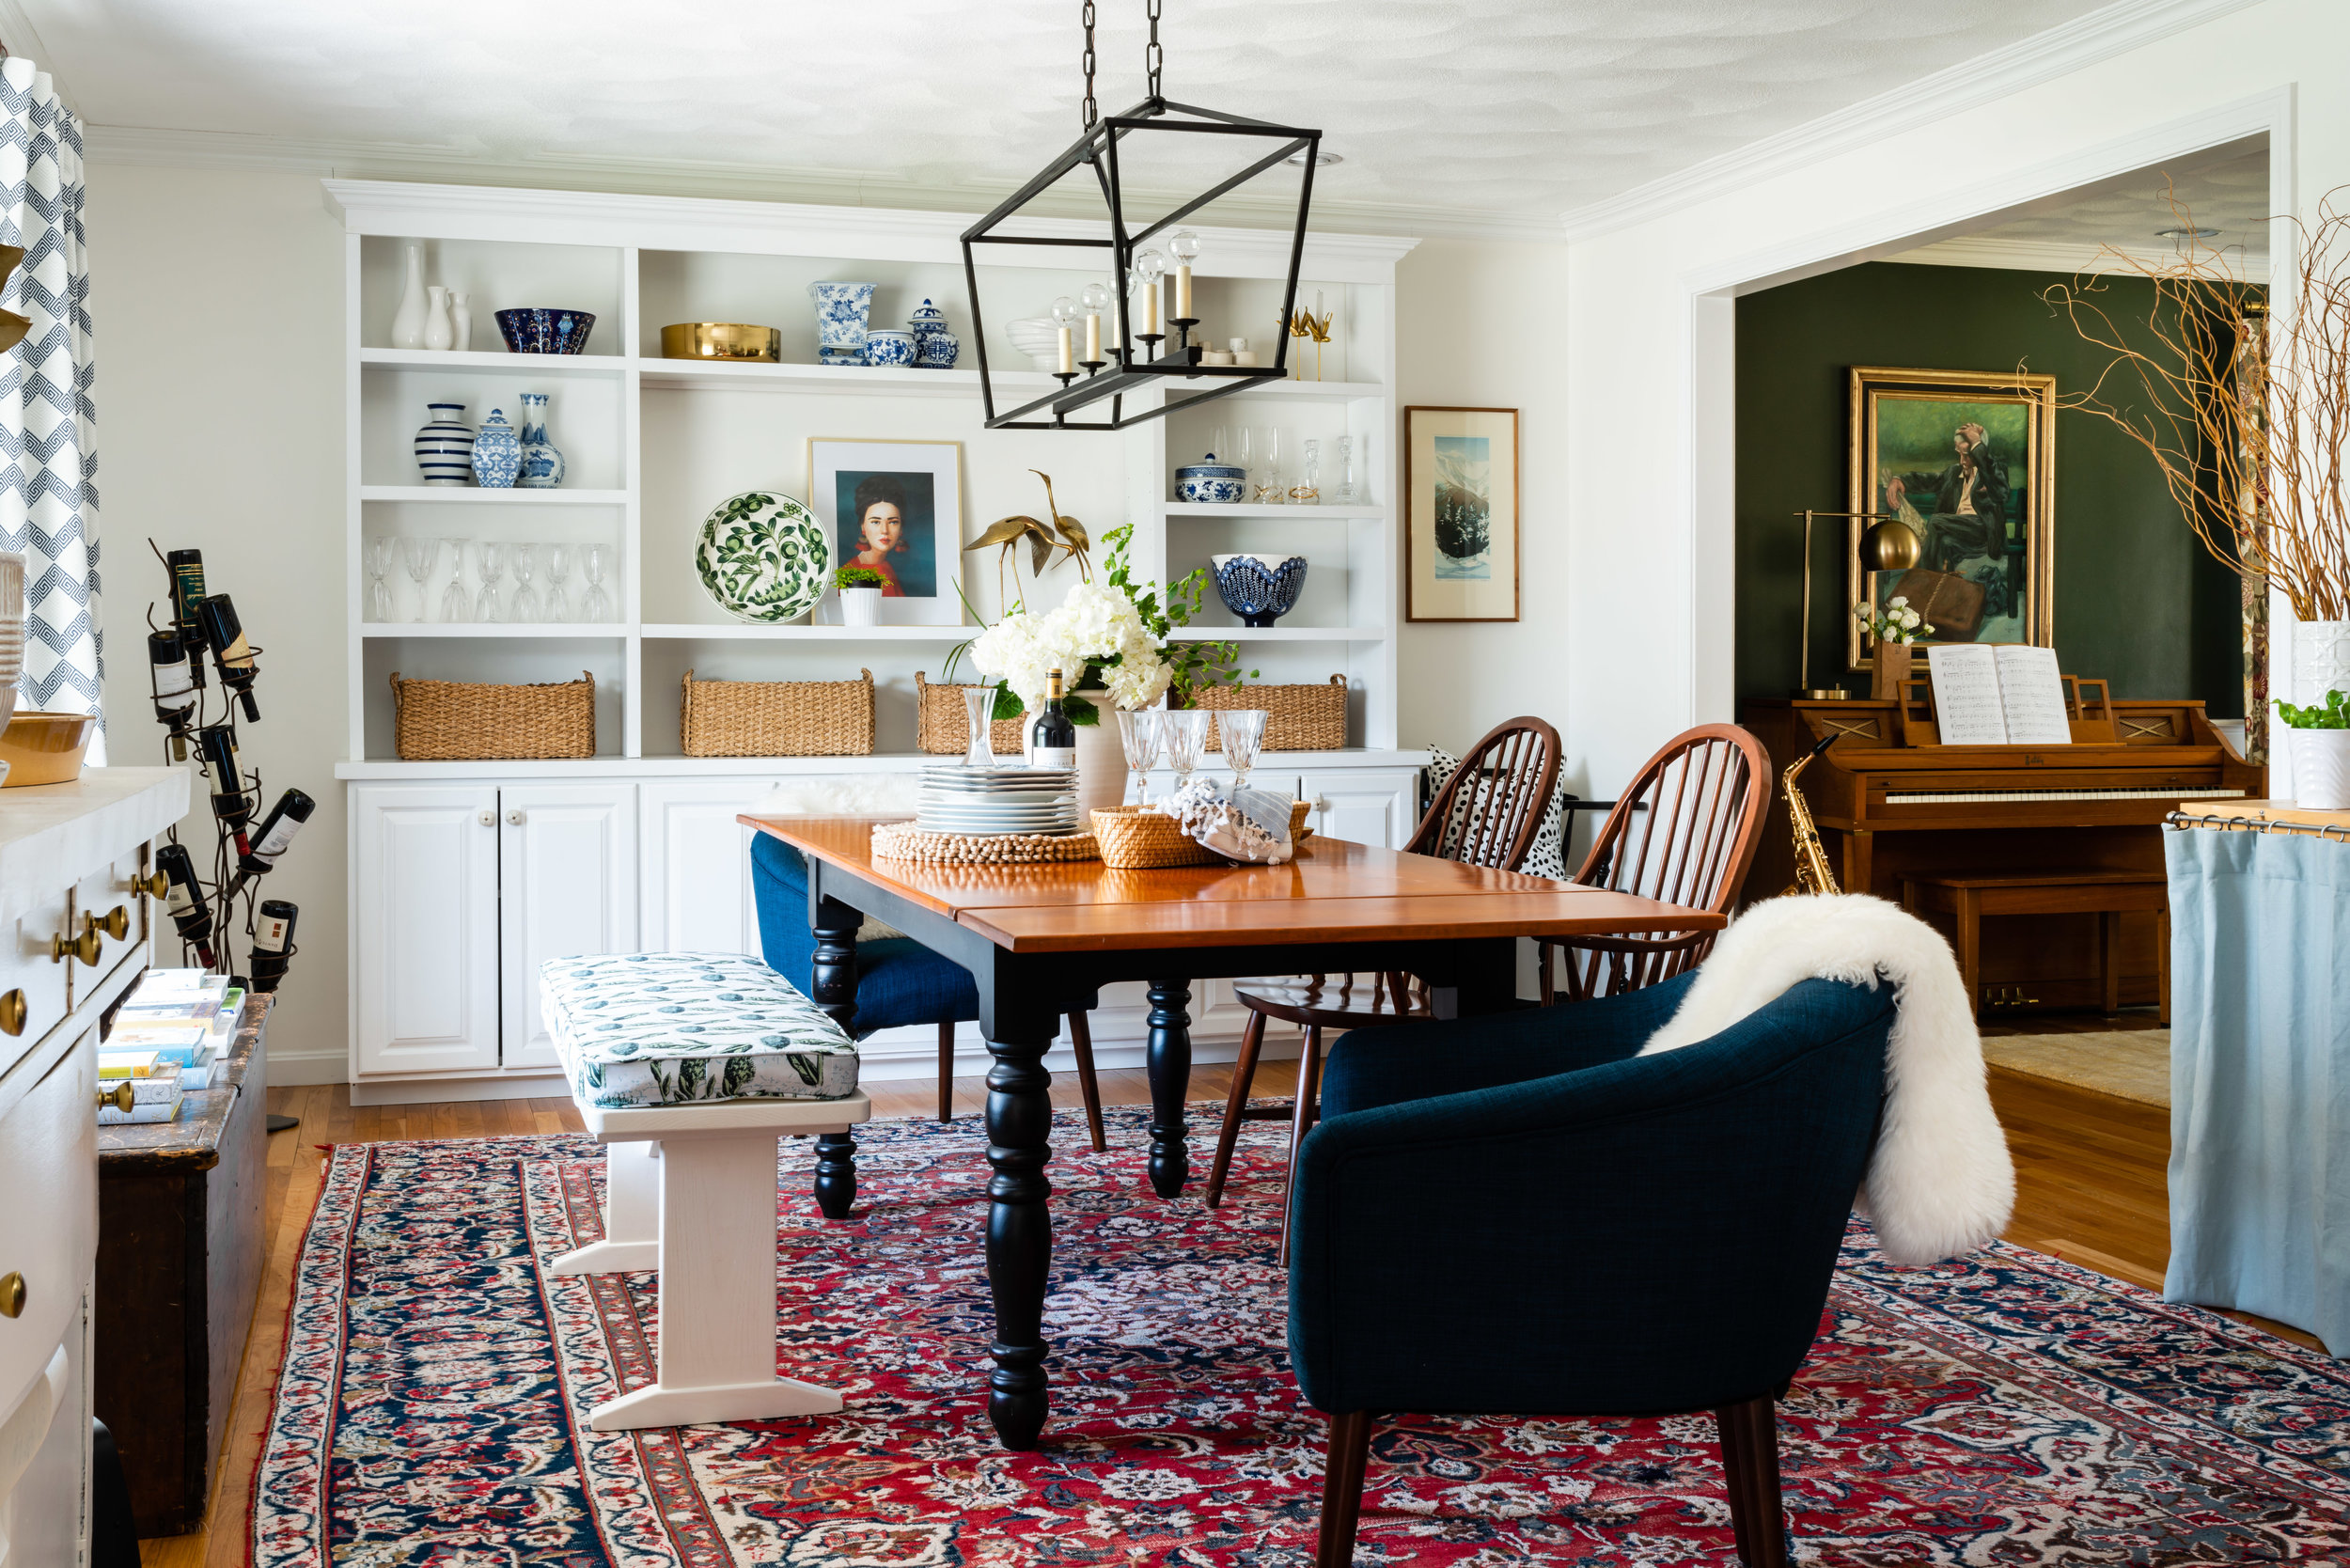
Once I received this gorgeous piece of Jill Rosenwald pottery, I knew I needed to change the dining room. Those beige-yellow drab walls did NOT cut it as a backdrop for this masterpiece, and although I didn't know exactly what I was going to do, I knew what direction I was going to go in. Once the ORC started, decisions were made by gut and intuition (hence, #projectontheflydining), and ultimately, I think it turned out pretty well. What do you think?

The first big decision I made, after coating the room with Simply White by Benjamin Moore, was what I was going to do for the window treatments. I usually visit the Boston Design Center for my textile sourcing, but given our limited timeline, and the client work I had on the table, I hit my local Calico shop for one-stop fabric selection and fabrication. I knew I wanted something graphic and blue, but wanted it to be a timeless pattern. As soon as I spotted "On Key" by Waverly, I knew it was the right one.

The fabric is upholstery weight, making for thick, luscious drapery. I chose a cartridge pleat (see in next shot) which allows for some movement, rather than making the panels entirely stationary. The window treatments were my biggest investment (a little extra because I had them rush the labor), but so worth it.
The next big decision I made was the light fixture. I had visited Light New England -- a favorite local lighting showroom -- a few weeks prior to the start of the ORC with a client, and fell in love with this linear lantern. It felt casual, yet elegant -- exactly what I was looking for in the feel of the room. I debated between the gold finish and the black finish, but ultimately felt the room needed a good hit of black (doesn't every room?) that tied in beautifully with the table legs and corner chair.


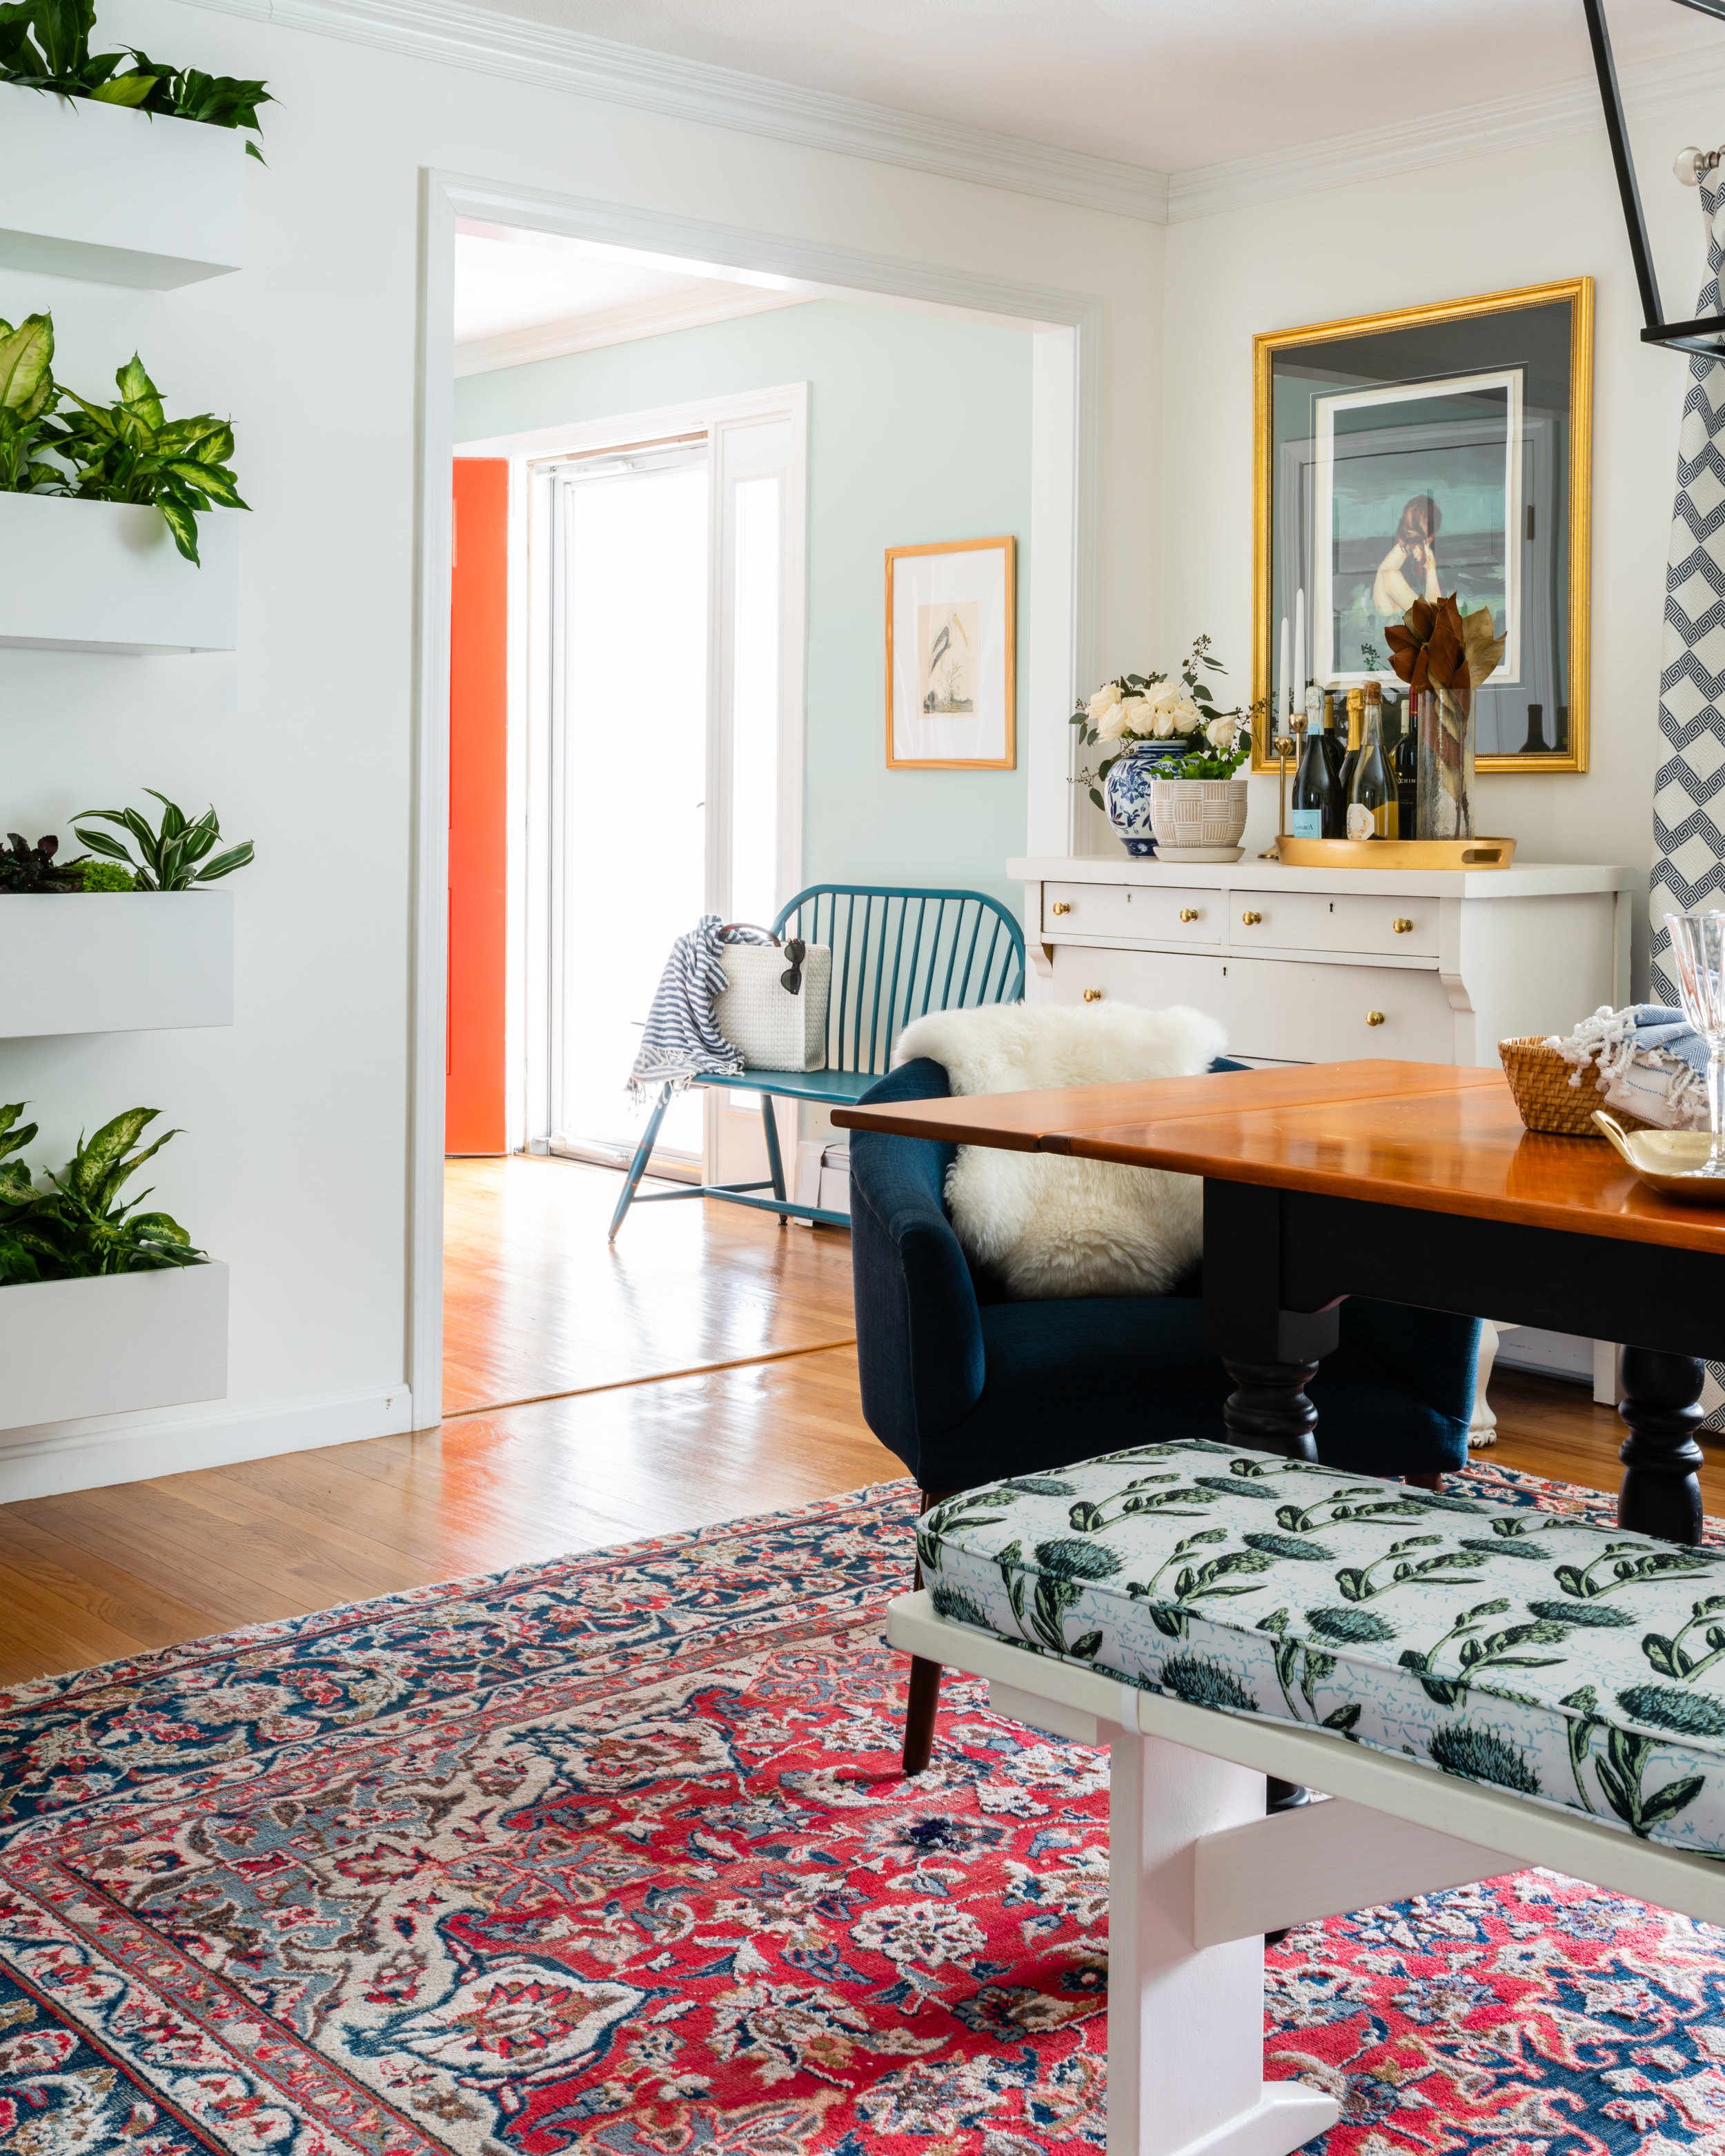
The biggest on-the-fly decision I made was installing a living wall in the dining room. I had already talked to my carpenter about recreating the wall that Ana and I installed in our showhouse room for my own living room, but as it got closer and closer to completion and installation date, I realized it would be an absolute showstopper if we installed it in the dining room instead. So we did, and it is!


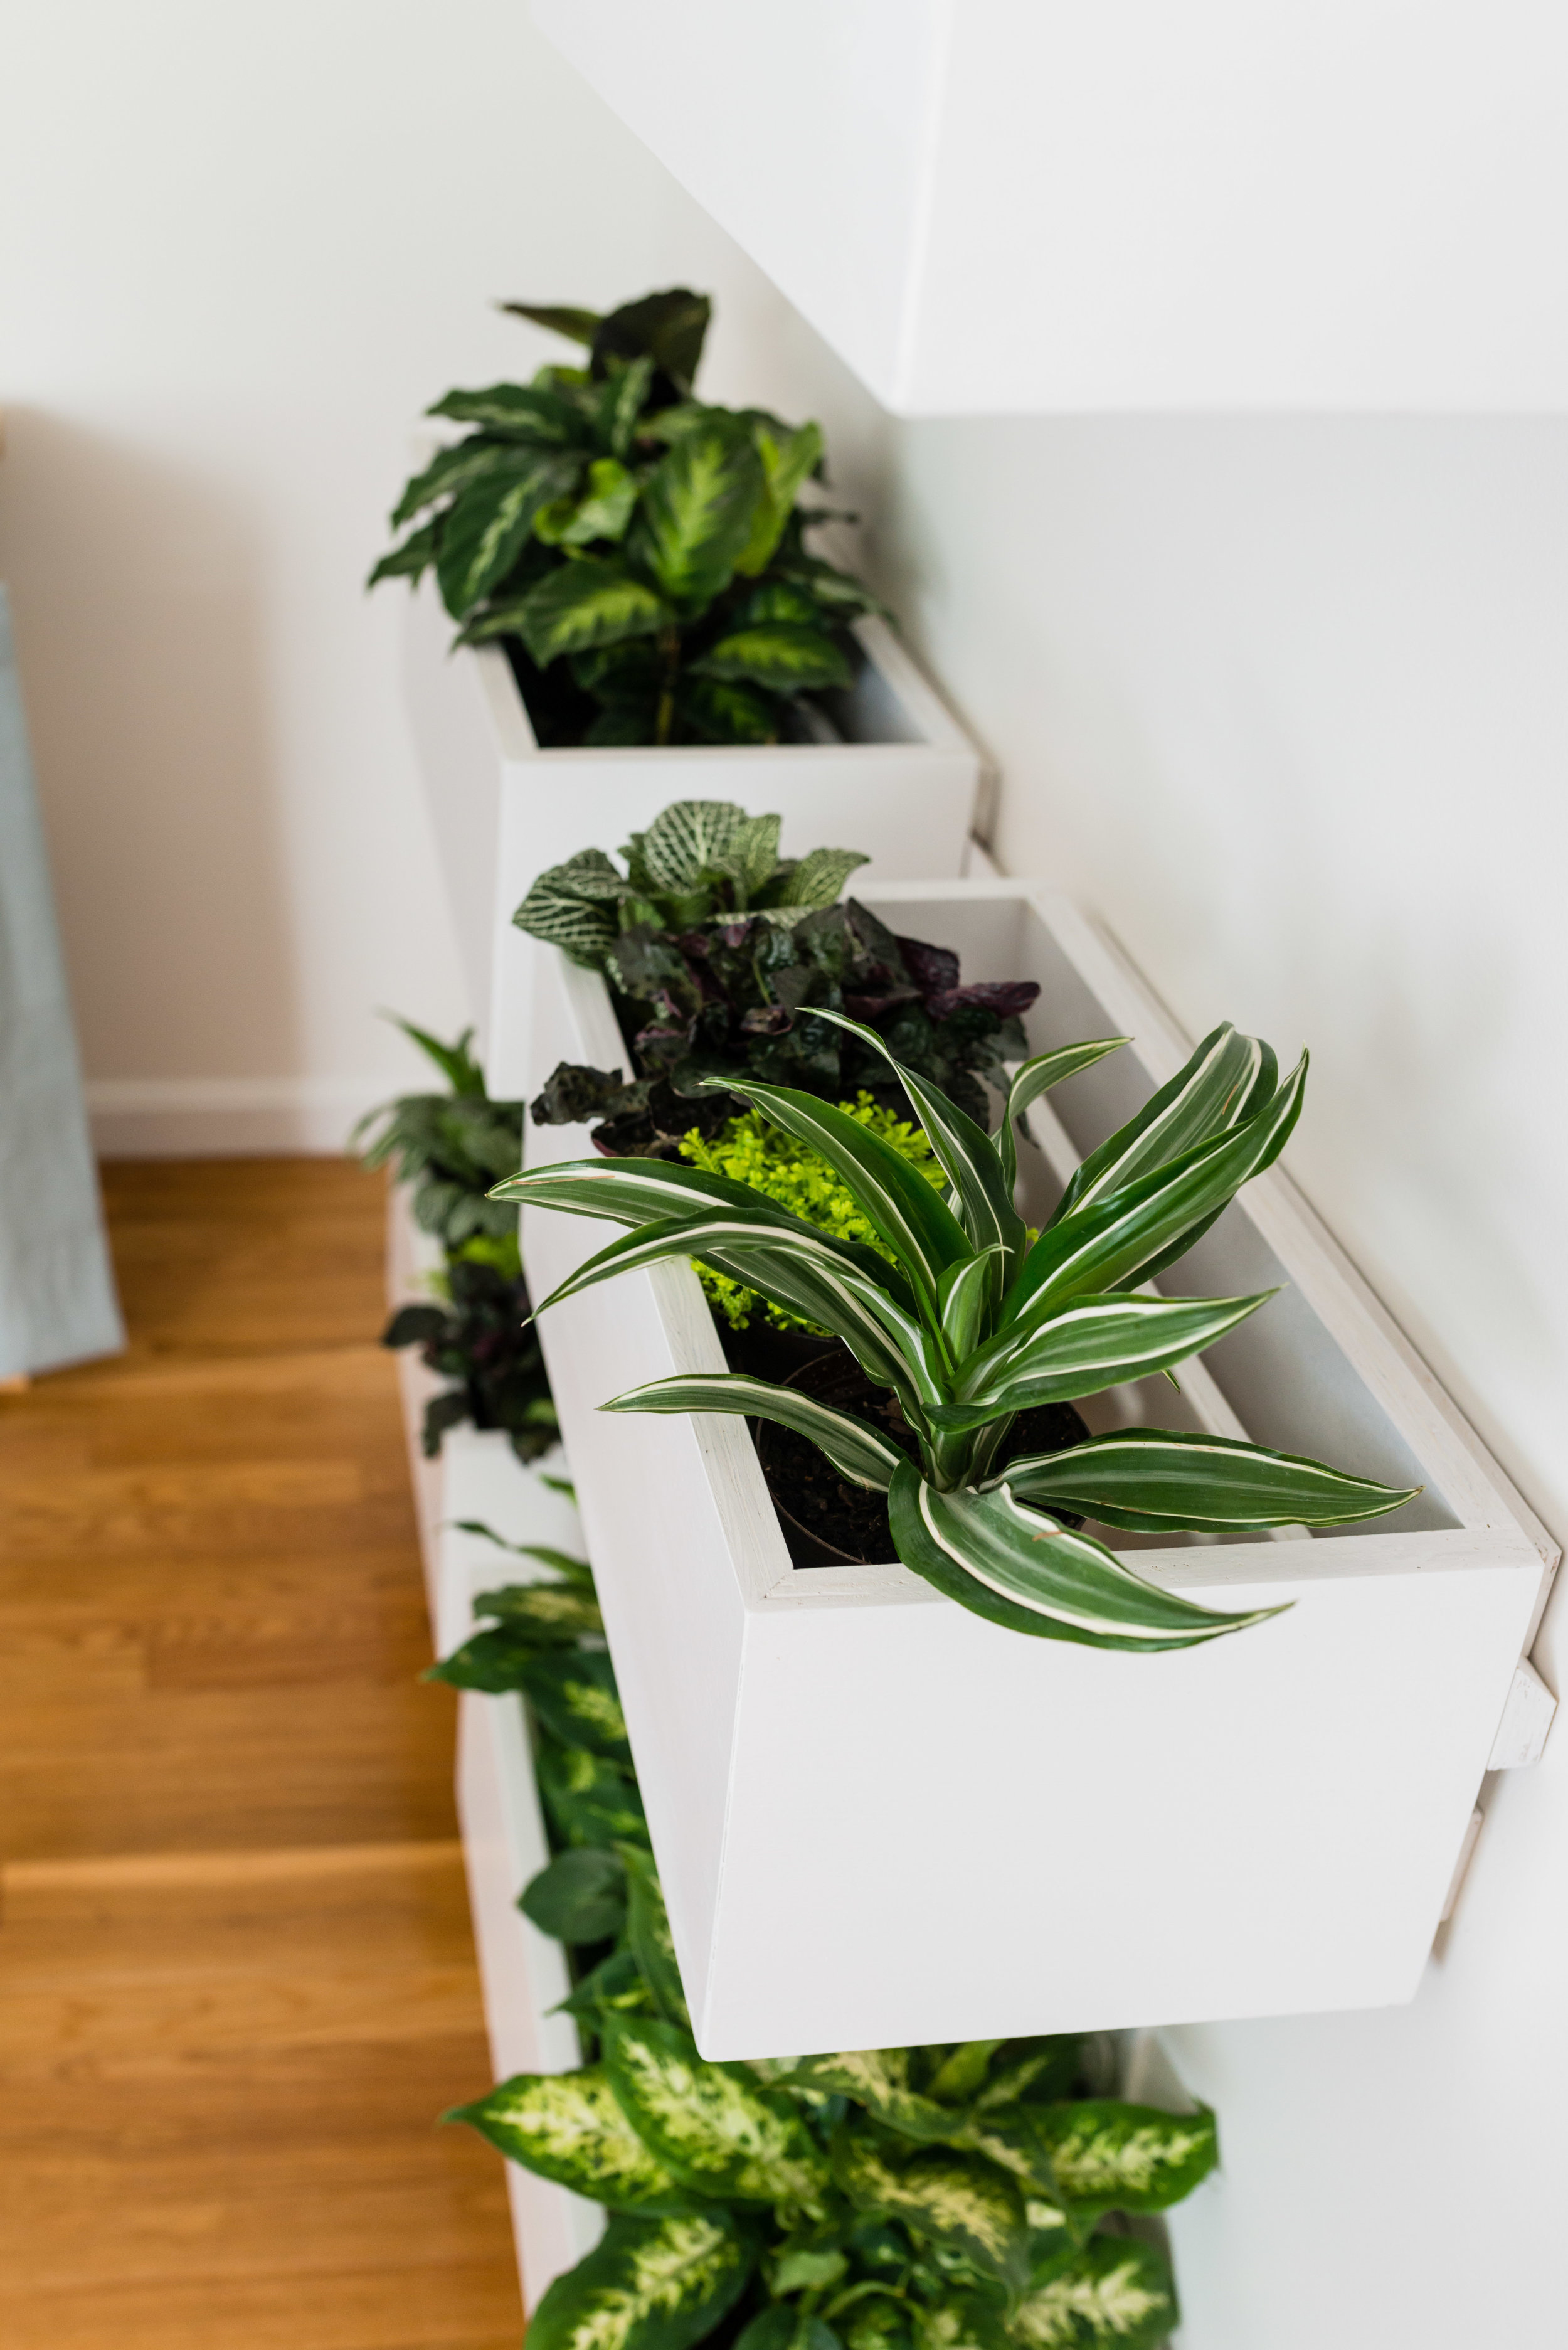
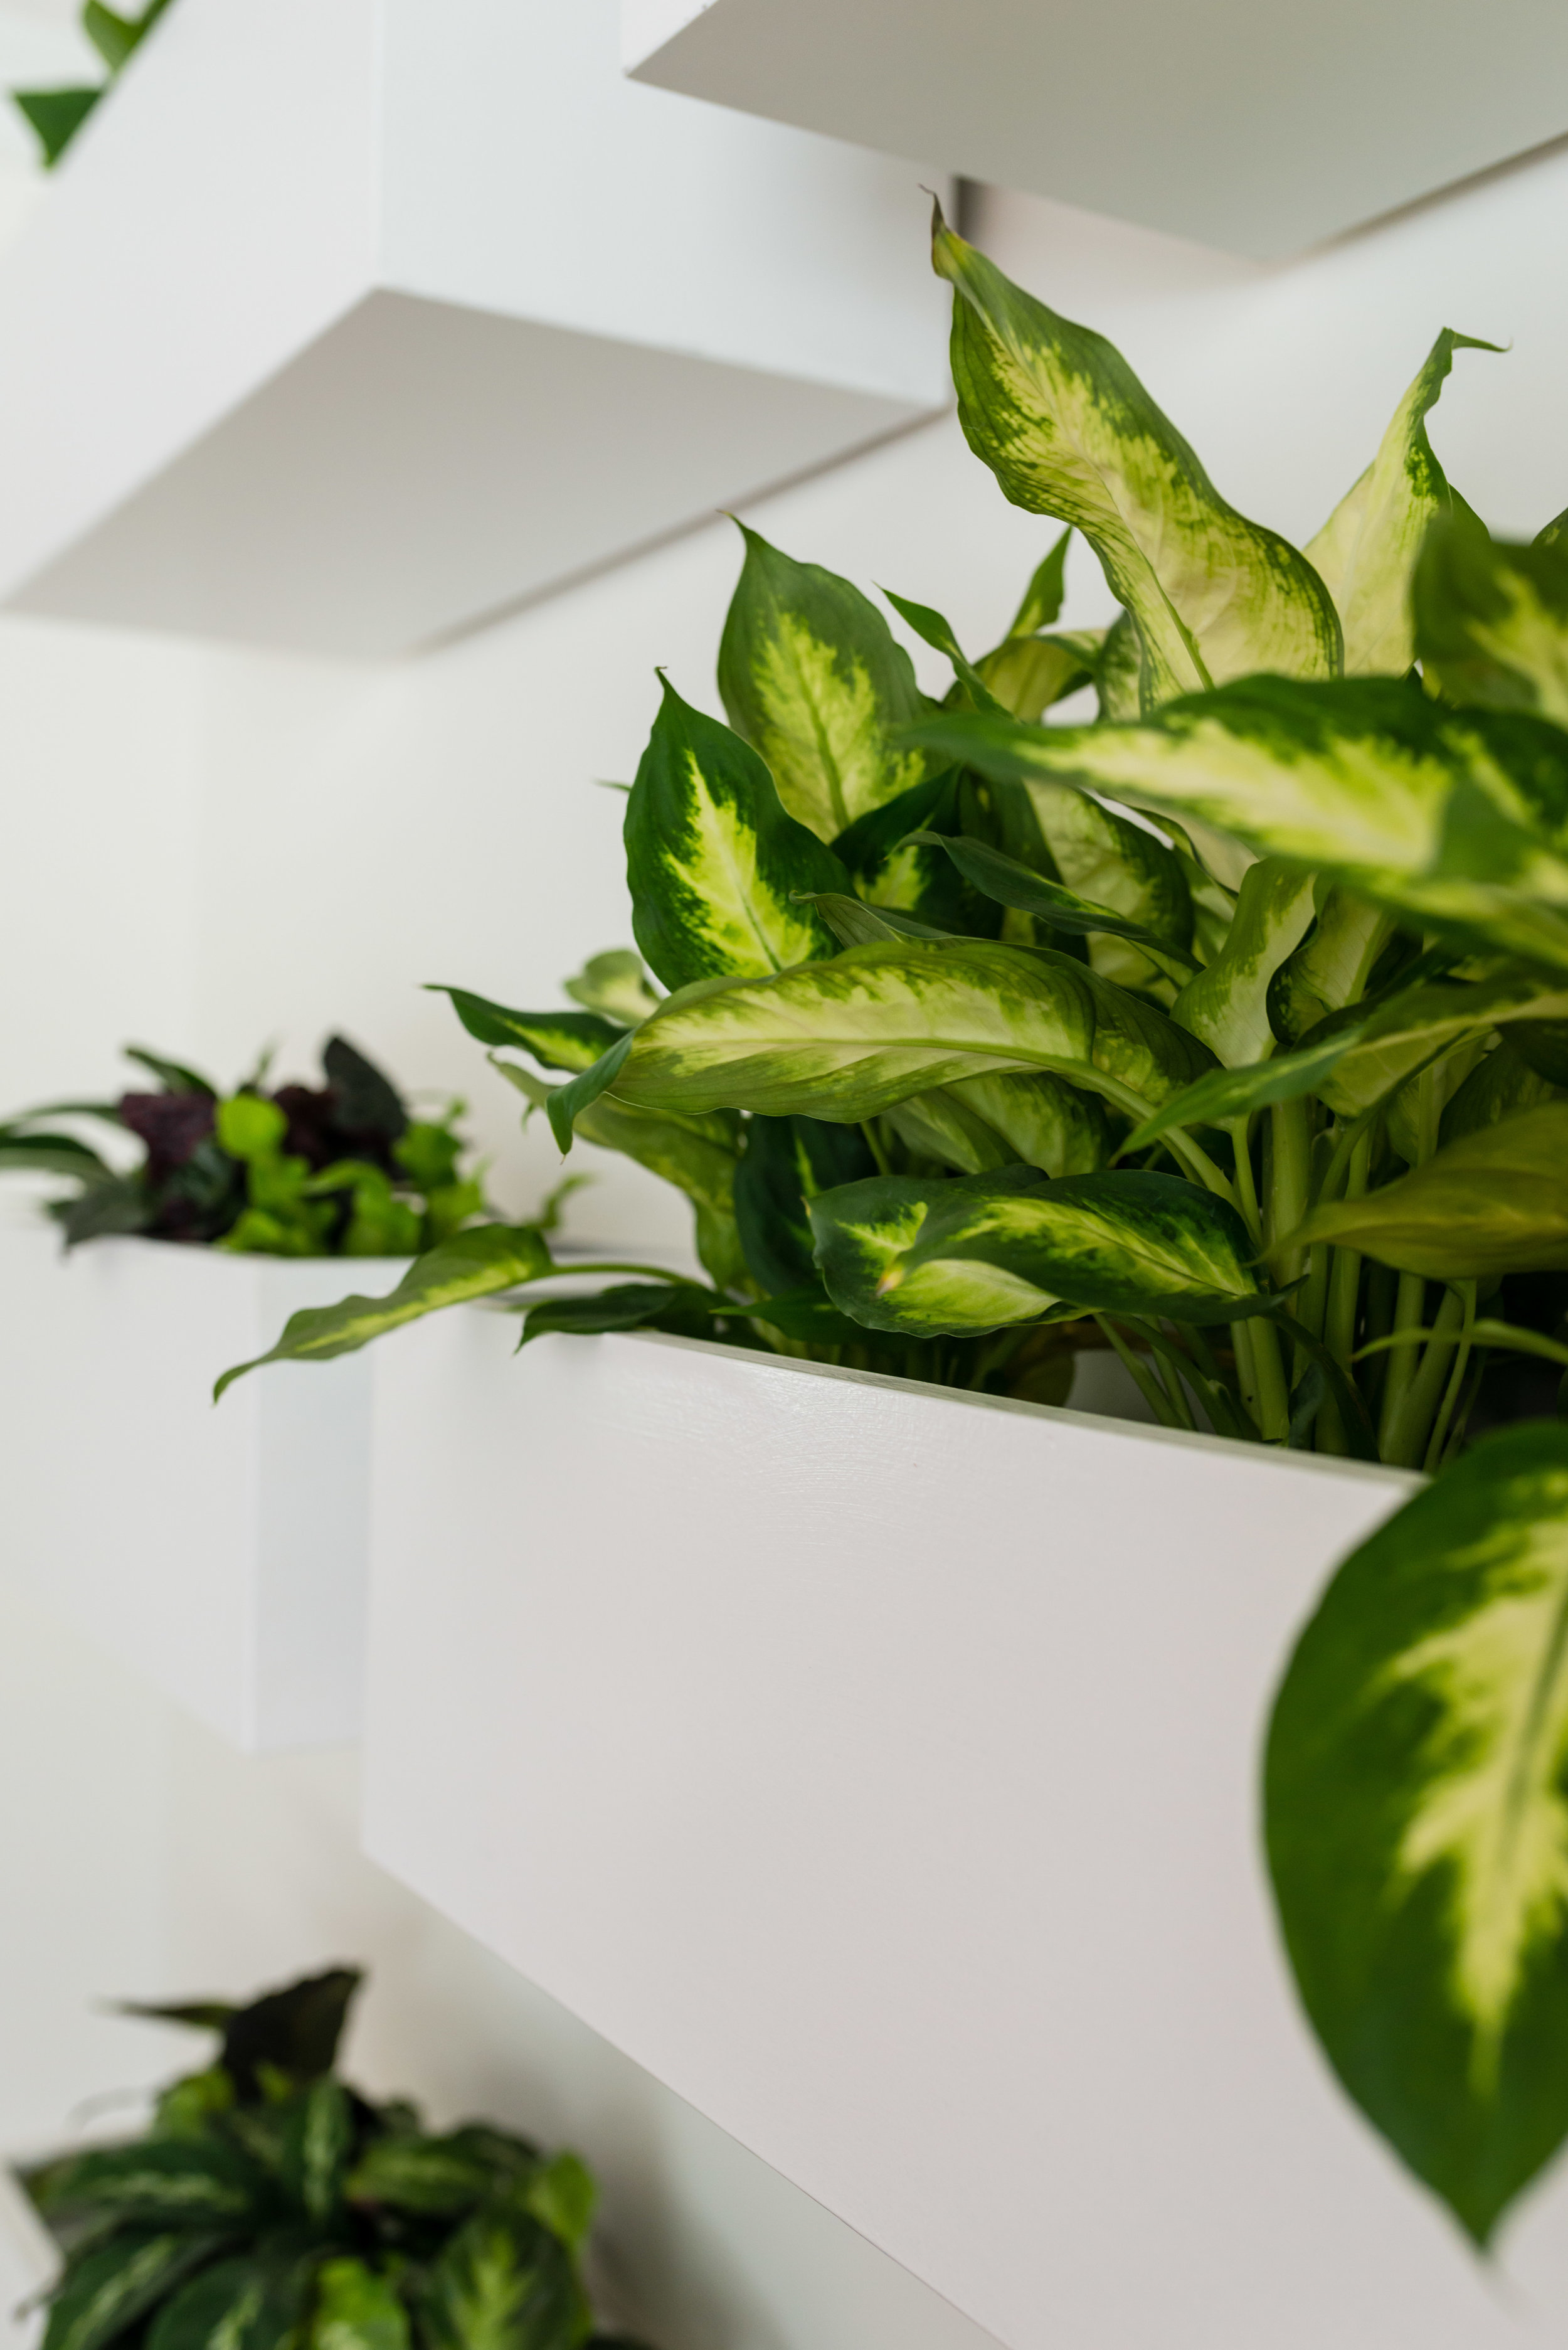
I've always struggled with what to do with this wall -- feeling like it needed a giant piece of art, but never being able to decide on what piece I wanted to invest in -- so this is the perfect solution. And yes, all the plants are real! They are indoor, low-light varieties, and as long as I water them once a week, they'll stay alive and well.
One of the things I love most about this room is the pattern mix of the bench cushion and the vintage rug. If you followed along for the past five weeks, you know that I was considering swapping out the rug for something more neutral. I was back-and-forth on it, but then I spotted a shot from Candis and Andy's book, and it helped make my decision a whole lot easier. It was like a message from the universe telling me to keep it (and I don't ignore messages from the universe).
The cushion fabric is Root Cellar Designs' Espalier Thistle pattern, and it's printed on their Porch indoor/outdoor textile, making it perfect for a dining bench. I love the modern botanical print, and the colors pull all the greens and blues from the room together beautifully.

When it comes to the furniture, you may have noticed that I didn't get rid of a single piece. Prior to this challenge, I was ready to scrap it all -- the table, the chairs, the chest of drawers, the IKEA shelving unit that we were using as a sideboard. But after this challenge, I don't want to change a single thing. I've fallen back in love with our cherry farmhouse table, Windsor chairs, and cheap end chairs from Target.

The bench feels like a new piece with a quick coat of paint and cushion, and the antique wood box feels like the perfect touch of history in the room.

The IKEA shelving unit got a quick upgrade with a last-minute table skirt made from the old linen/cotton drapery.

Even the chest of drawers, which up until the night before the photoshoot I had planned on painting navy, feels perfect in the space.

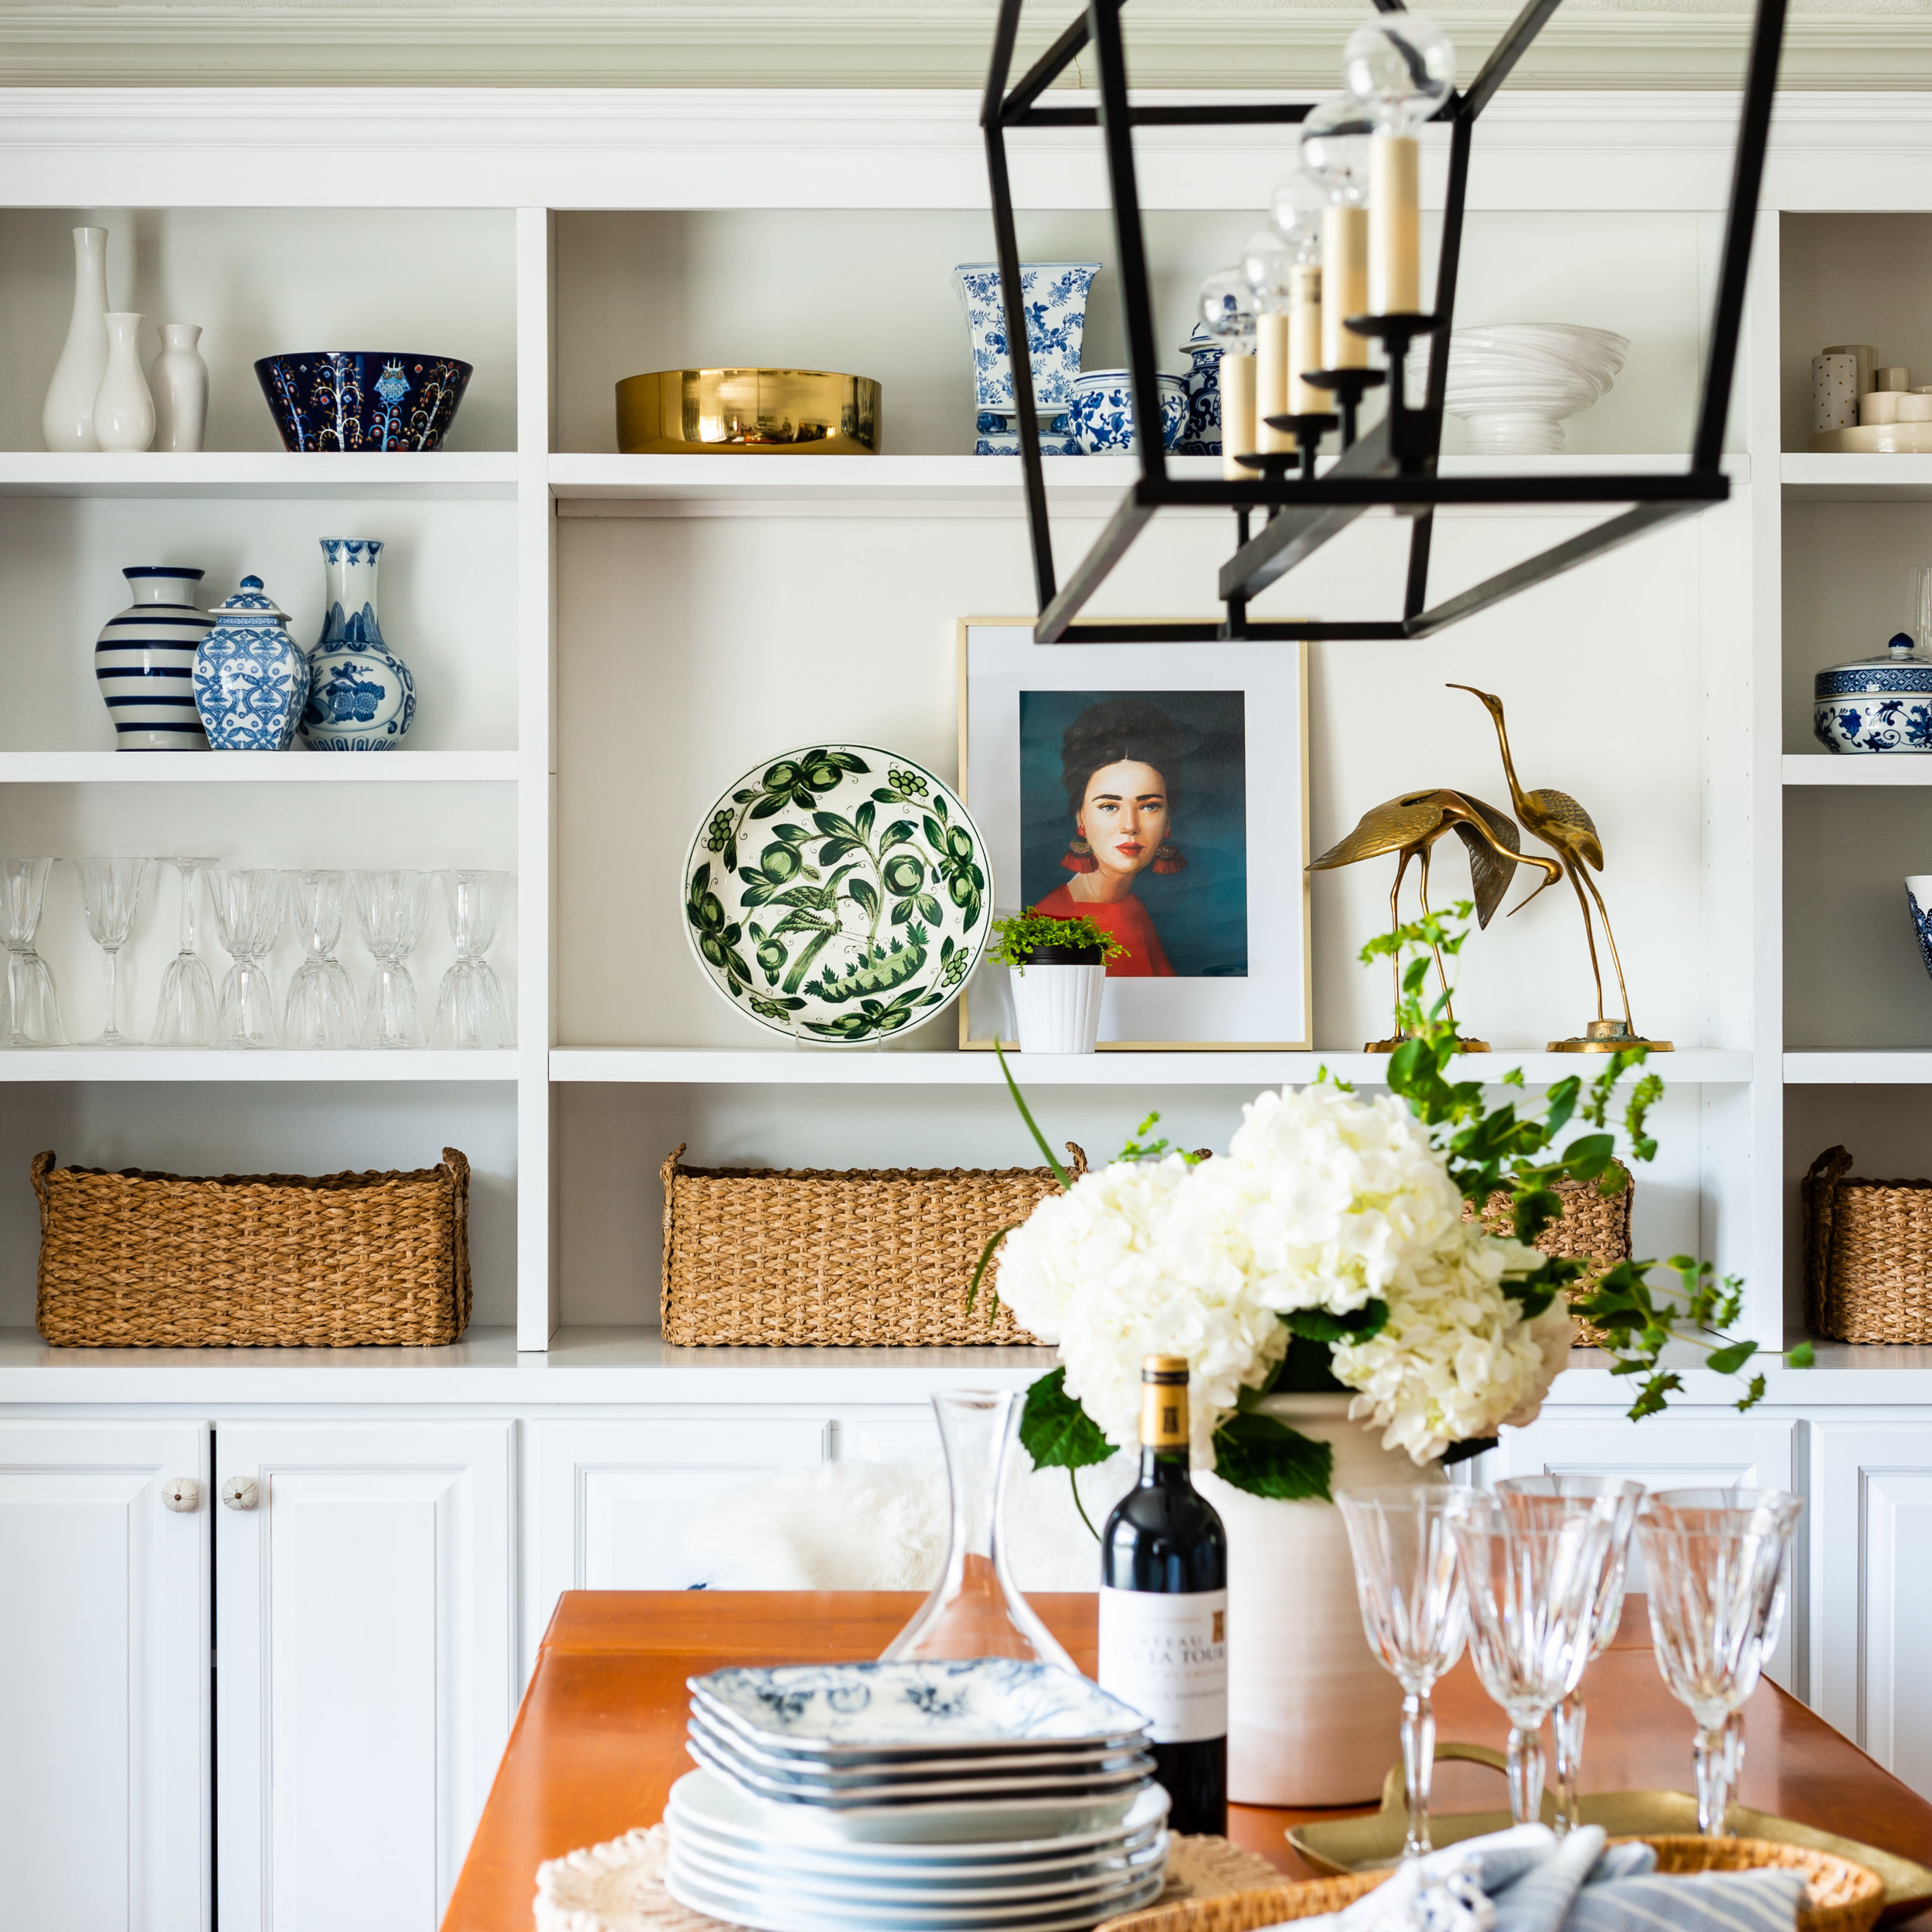
Finally, let's talk ART. There are only a few pieces of art in this room, but without them, particularly the portraits, it would feel entirely different.
For those of you who follow me on Instagram, and have seen my #startwithart series, you know I'm a fan of Janet Hill Studios. I've had this piece for a few months and wasn't sure where I wanted to put it, but as soon as this challenge started, I knew she would take center stage. Her statement earrings are just perfect , and the hit of red adds just enough to connect the rug to the rest of the room. I love her so, so much.

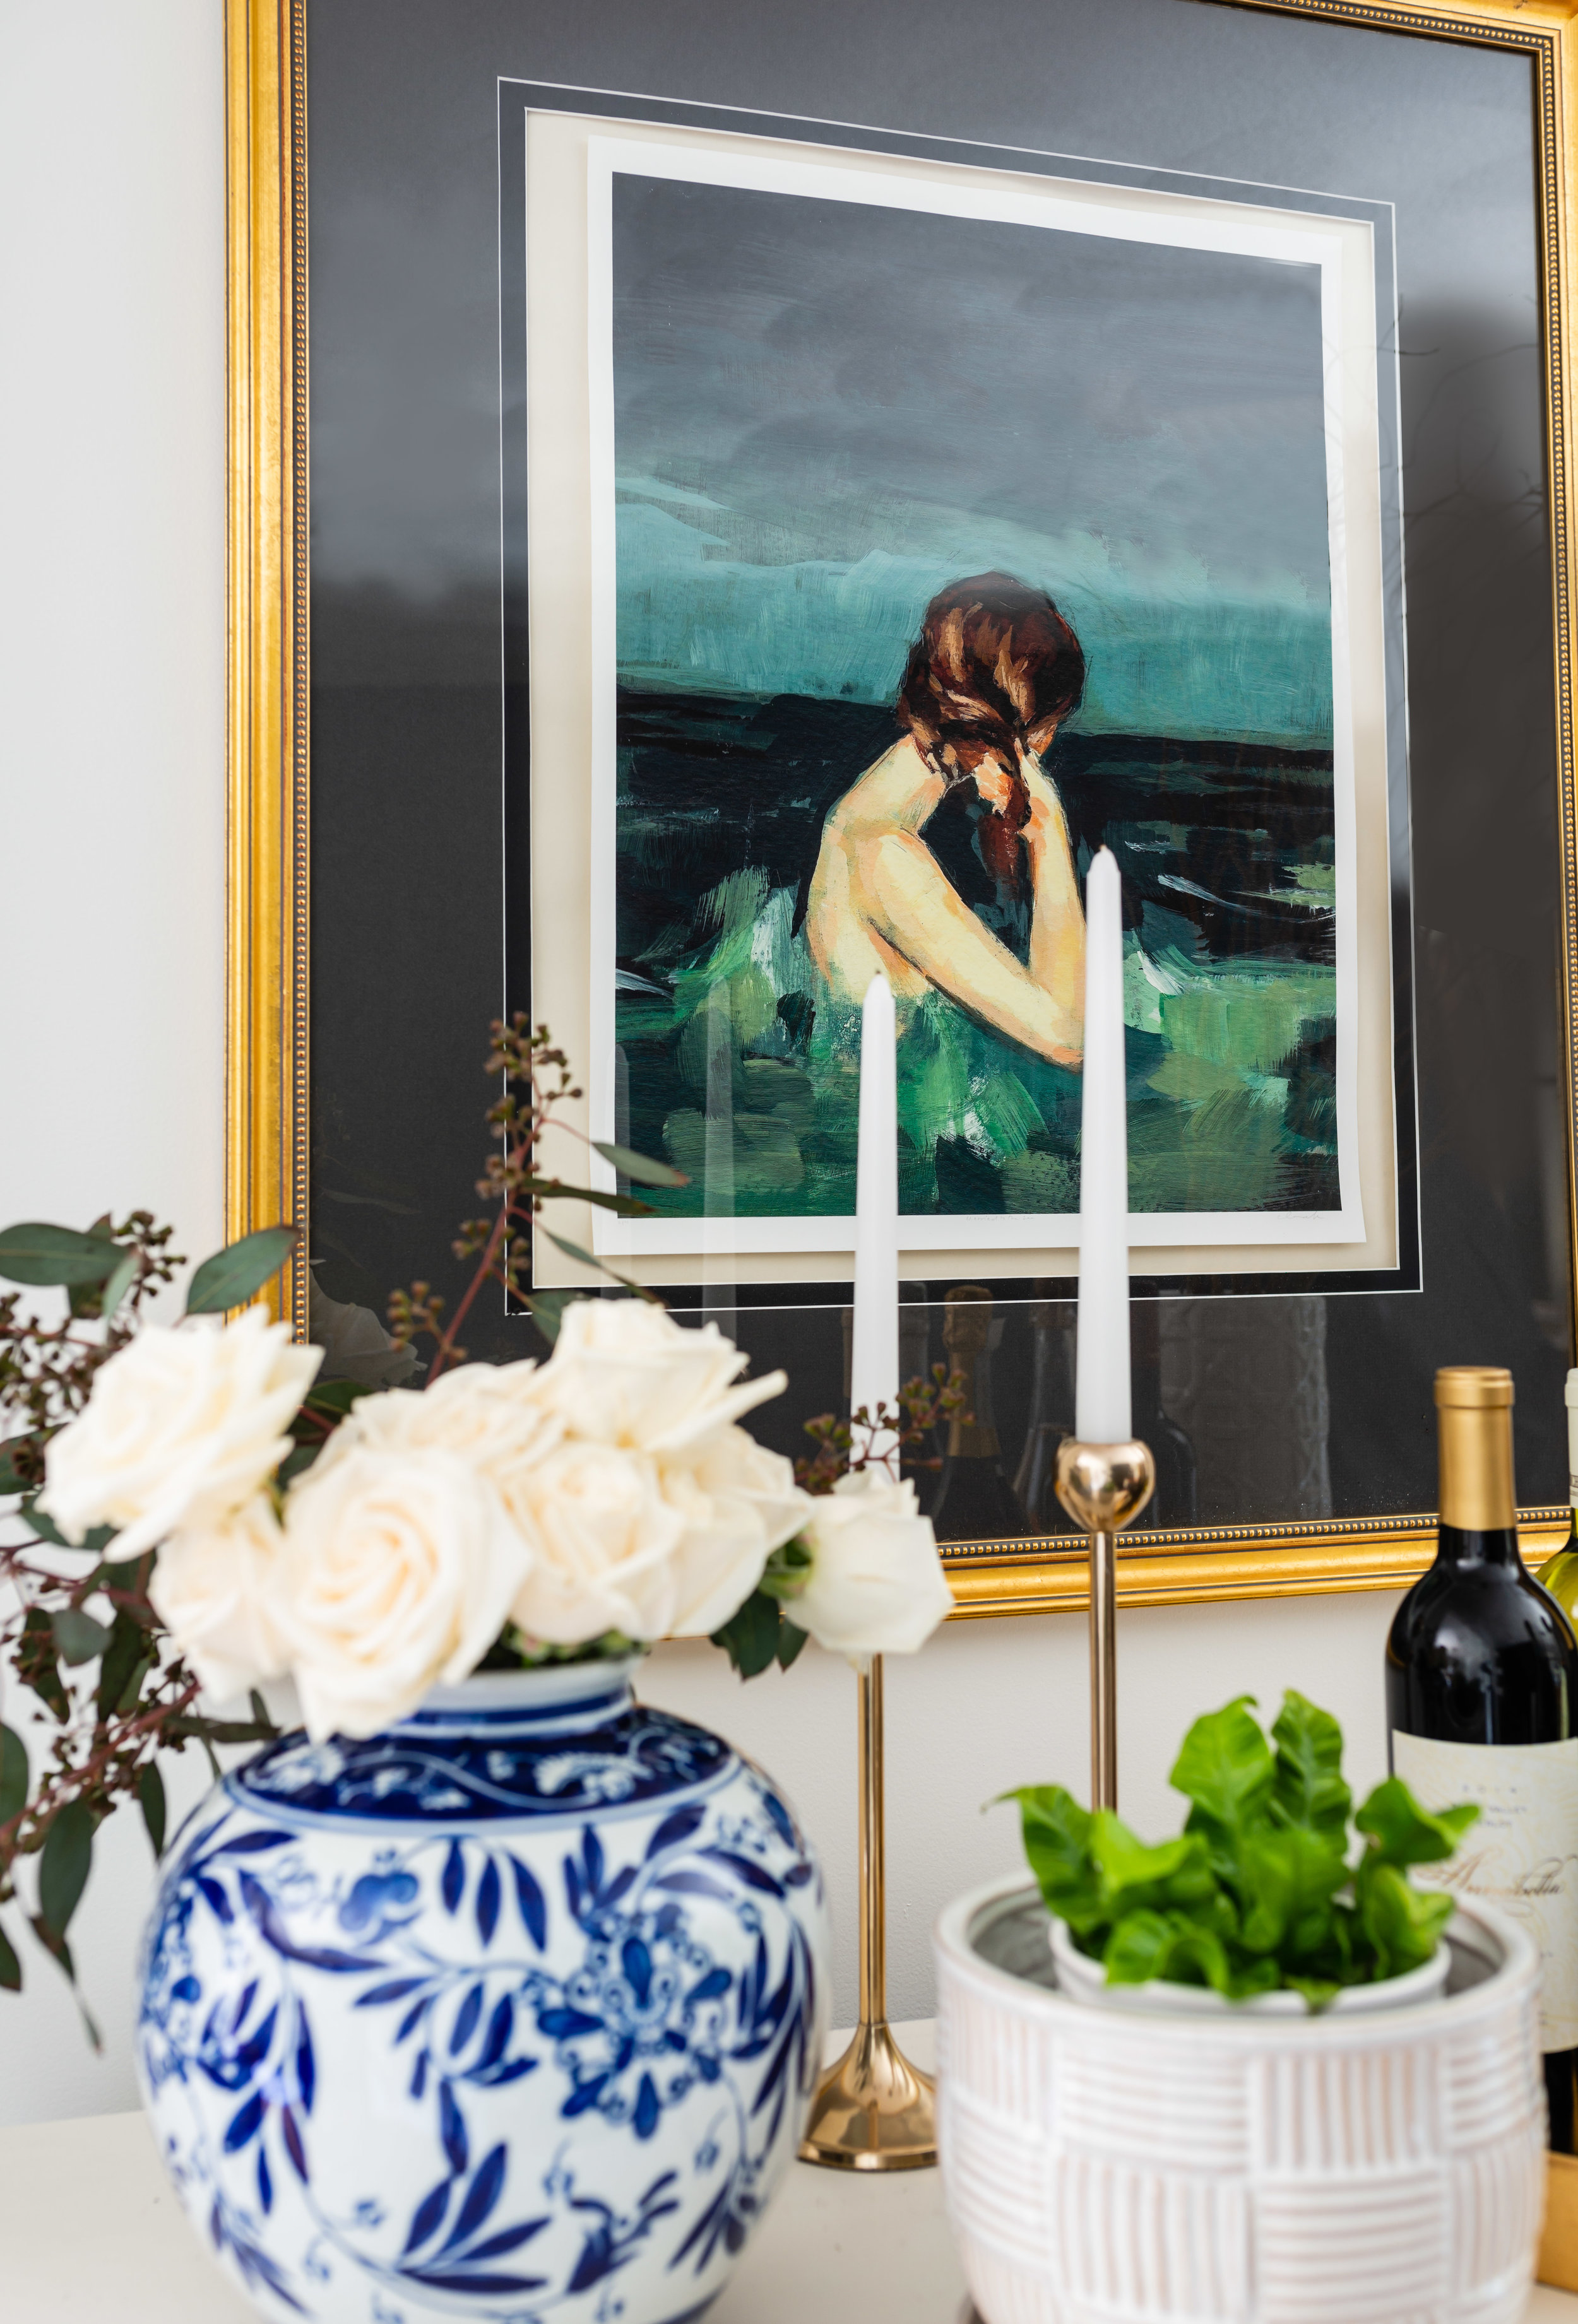
The other piece, from Clare Elsaesser, is one of my long-time favorites. I've had her for years and years, and she's moved around the house a lot. I'm a big fan of the ocean, but am not always drawn to seascapes. This piece captures that love while feeding my attraction to portraits. It's mysterious and lovely.
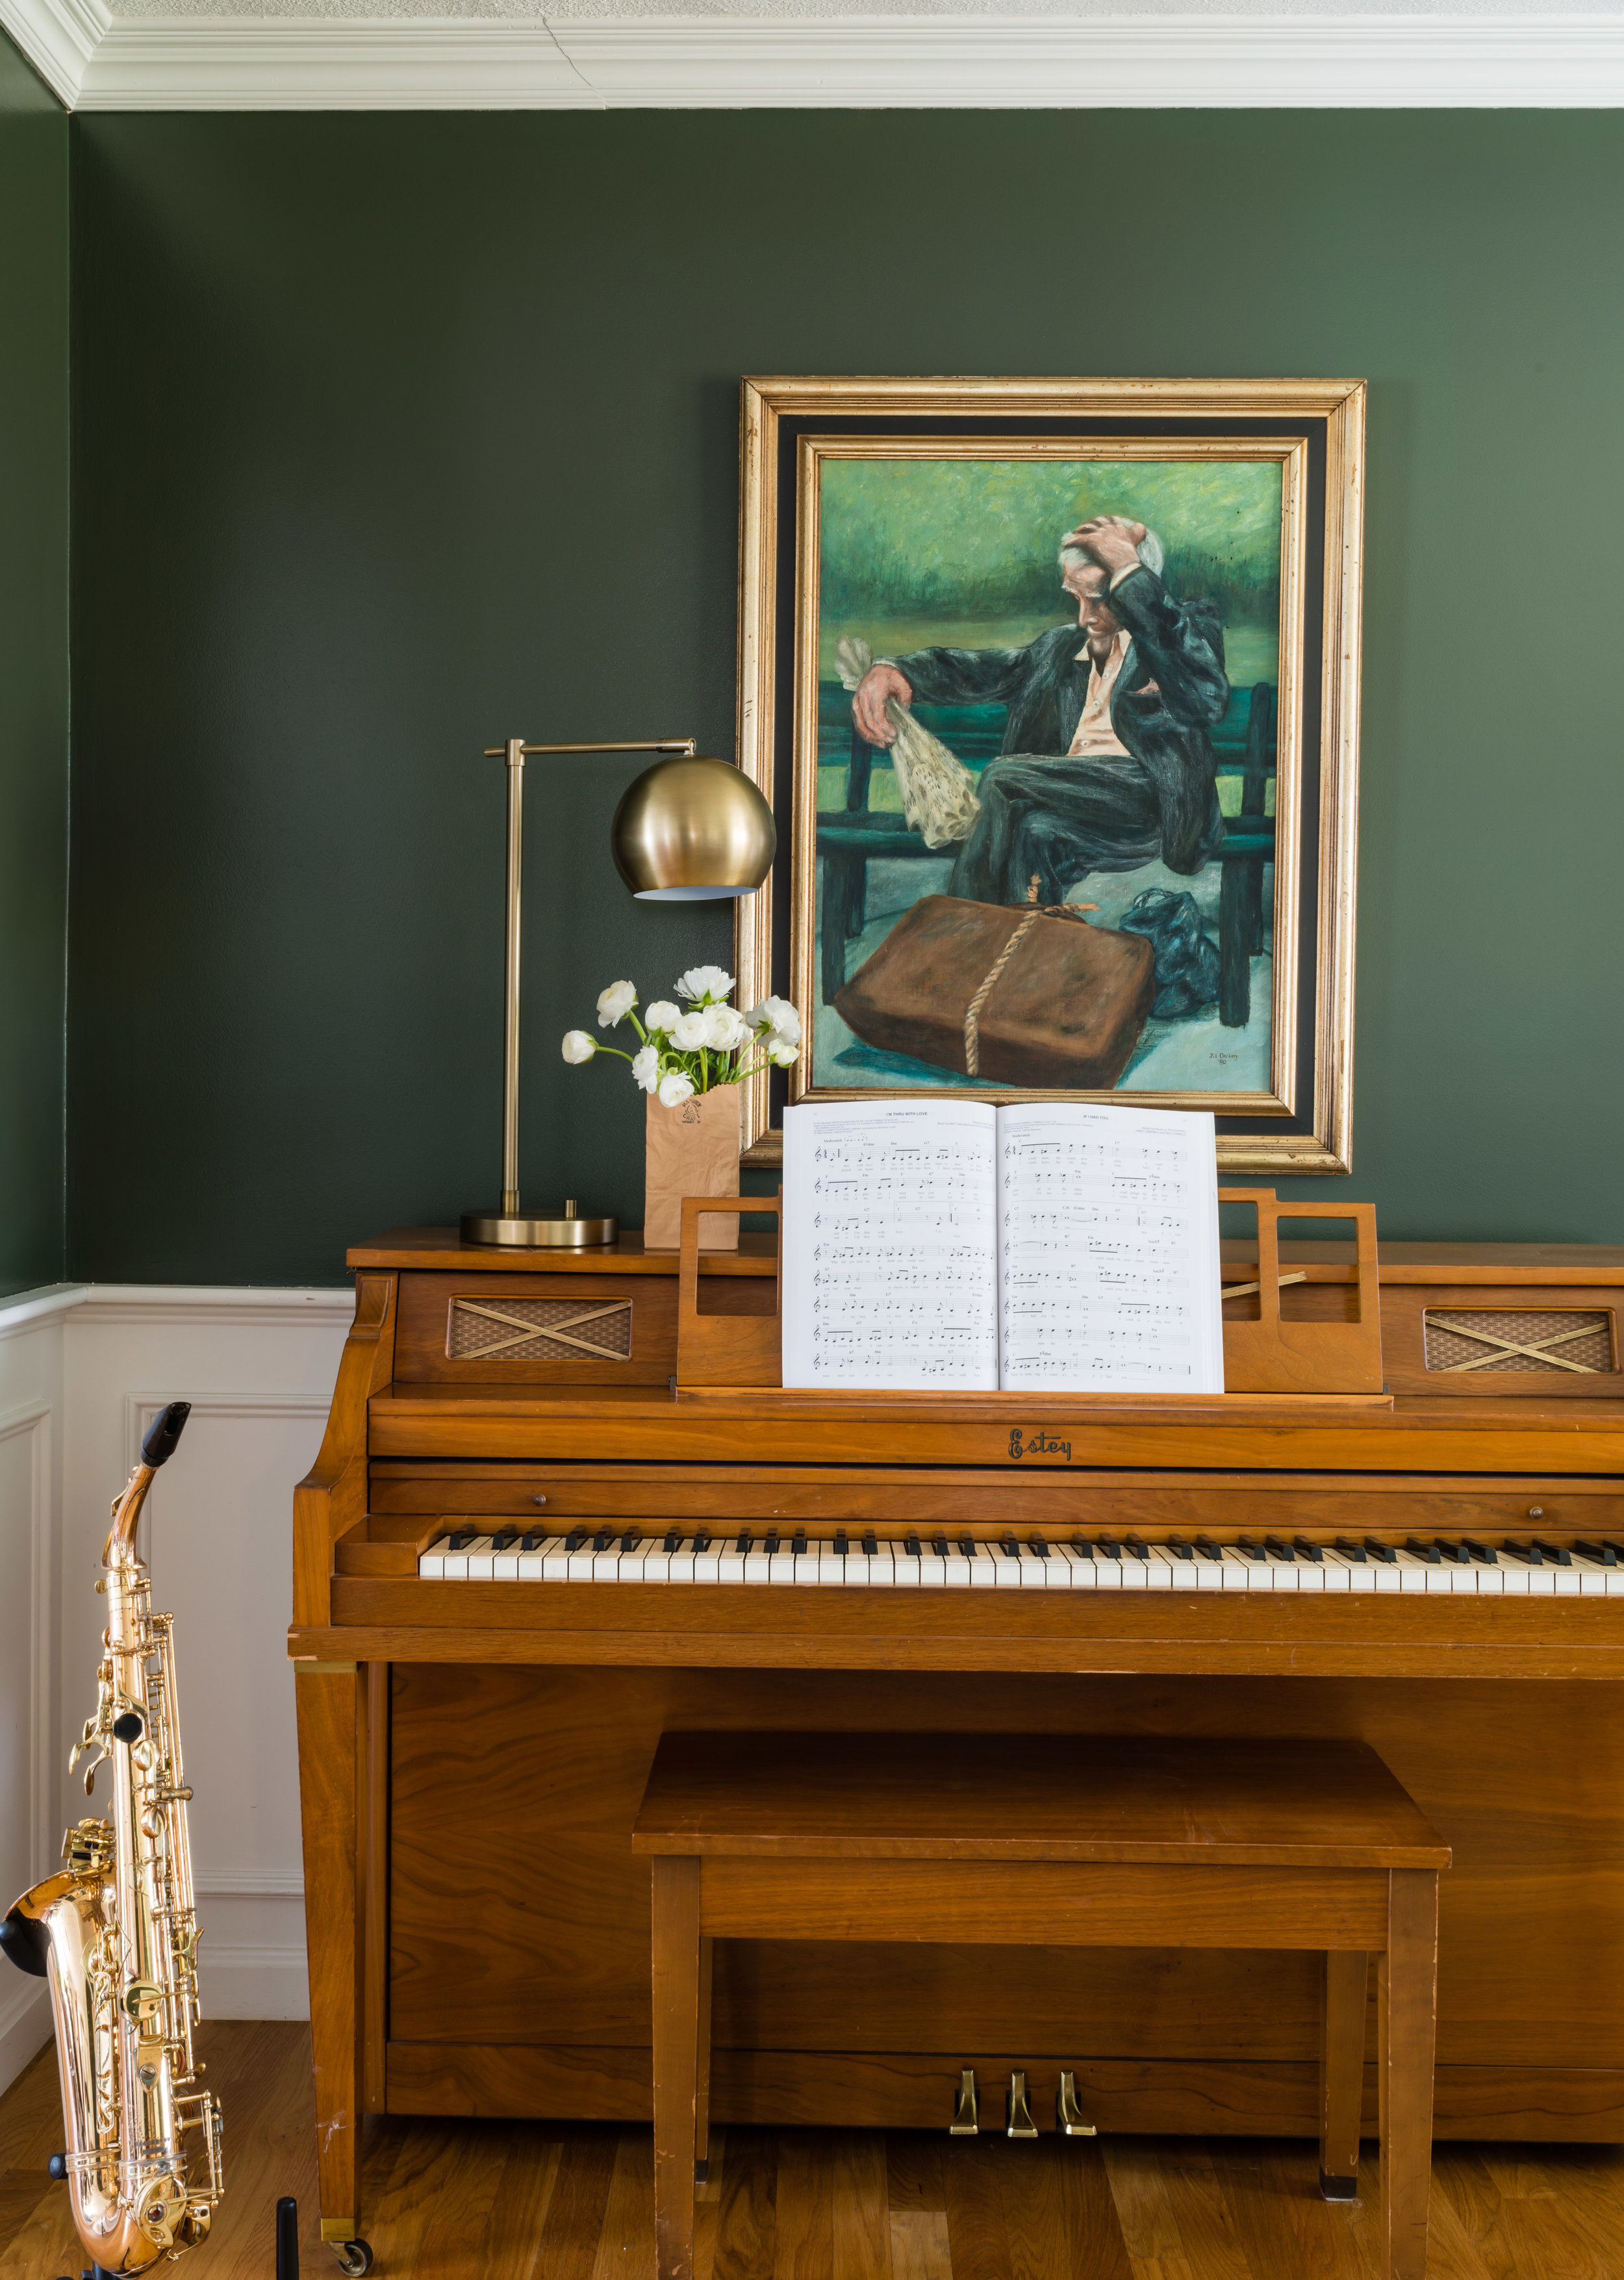
Finally, although technically not in the room, this guy in the far corner can't be ignored. I got him at an antique shop in Culpepper, Virginia, only after NOT buying him, and then frantically calling the shop once I got home realizing what a big mistake I had made. Purchasing him inspired the first change to this downstairs space (those walls were originally a dark coral, but he told me he needed dark green), and the room flows so beautifully now.
I know everybody loves a good before and after, so here are a couple of pretty dramatic ones, comparing today's room with the original real estate listing photos when we bought the house.

In Week Two, I outlined how I wanted the room to feel when it was done. This was key, since I didn't have an actual plan, so the list of words helped guide my decisions as I went along.
WARM, ELEGANT, SPACIOUS, COZY, FEMININE, NOT TOO FEMININE, CLASSIC, THOUGHTFUL, UNEXPECTED, NEW, TIMELESS.
How do you think I did?
Before signing off, I want to say a giant thank you to the industry partners who helped me execute (and capture) this room so quickly and beautifully.
- My carpenter-in-chief, Bill Jones of Ace Nolan Millworks
- Ann Maderia of Calico Beverly
- Gregg White of White Home Improvement
- Laura Braun of Laura Braun Interiors
- Jeff Pomeroy of Light New England
- Joe Spinale of Spinale Electric
- Jessica Delaney of Jessica Delaney Photography
And last, but not least, I thought I'd share a quick playlist...this includes some of the songs that Jessica and I listened to as she shot the room last week, and it captures of vibe of the room perfectly. (Full disclosure: my brilliant niece is the one who pulled together the original playlist, but everybody asks for it when I play it, so I thought I'd share some of my favorites!)
Thank you Linda, House Beautiful, Candis and Andy, the featured designers, guest posters, and readers who have made this challenge so fun to do and to follow. Here's to Fall 2018!
(For those interested, I'll have a big post with direct links to many of my ORC items and sources next week. Keep an eye out!)
All photos, with the exception of the "before" shots, taken by Jessica Delaney Photography.